1-888-392-8766   0 Cart
Added to Cart
    You have items in your cart
    You have 1 item in your cart
    Total
    Check Out Continue Shopping

    Articles

    How DO I Wash My Car?

    How to wash a car, best car wax, why are there spider webs on my paint?

    Many of us enjoy the benefits of a freshly hand washed car. However, without proper knowledge you may be doing more harm than good. Washing a car improperly will induce micro-marring known as swirls or spider-webbing.

    The cause of this damage is due to foreign particles trapped in your washing materials. This can happen several ways, such as:

    • Improper storage of materials when not in use
    • Improper materials such as using Dishsoap* (See bottom note), old T-Shirts etc.
    • Improper washing techniques which lead to further damage in the drying stage

    Materials

    The following materials are recommended for proper washing:

      Procedure

        STEP 1

        When washing a car try to do it in an atmosphere where the paint surface is not hot to the touch.  Shade or garages are the best locations.  Overly high temperatures cause the water and soaps to evaporate too quickly, not giving them a chance to remove the necessary dirt particles.

        If possible work from top to bottom in a downward angle.

        STEP 2

        Start by thoroughly spraying the entire vehicle with a nozzled hose or pressure washer.  Pay particular attention to heavily soiled areas, trying to remove as much dirt as possible in this stage.

        STEP 3

        Use a Soap/Shampoo specifically designed for washing automotive paints. These Soaps/Shampoos have special oils and lubricants in them that are specially designed to lift and remove foreign particles. These Soaps/Shampoos are also very low on the PH scale and will not strip previous waxes.

        STEP 4

        Start by washing the wheels, this will prevent any brake dust, or harsh wheel cleaners from contaminating a freshly washed panel.

        STEP 5

        By using two buckets you greatly reduce the possibility of tracking dirt into your wash mitt. Your soapy water will also stay much cleaner.

        Simply fill one bucket with your soap/water mixture and the other bucket with just water.

        After every application of soap/water dip and shake the wash mitt in the water bucket. This will loosen and clean the wash mitt BEFORE applying more soap/water to the mitt. The Soap/Shampoo solution will stay much cleaner and the majority of dirt will stay in the water bucket. You can also use a special Grit Guard Bottom. These provide a screen or false floor in the bottom where loose particles fall beneath. This makes it impossible to come in contact with these particles when re-entering the wash bucket for more soap.

        STEP 6

        Scrub the vehicle from top to bottom, try to follow the contours of the vehicle or any distinct body lines.

        By doing this, mishaps are much less noticeable. By washing in a circular motion any mishaps will be visible at all angles and much more noticeable. Rinse often! After every application of soap, rinse the vehicle before going back for more soap.

        STEP 7

        After you are finished washing, do a final rinse on the entire vehicle.  For the final rinse remove the hose nozzle. Start from top to bottom, and with the flowing water inches away from the surface, sheet off any remaining or misses of debris/soap.

        This sheeting rinse will pull materials down and leave much less water on the surface. There will be little water beading with this technique making it much easier and quicker to dry.


        Example of sheeting water

        Example of beading water


        *NOTE: Using dish soap regularly to wash a vehicle will strip your protective waxes. The high acidity will also dry out any plastic/rubber trim over time. However, there is a certain time you DO want to use a dish soap! There are times you would like to strip off your current waxes and try a new product.  Dish soap will remove these waxes and leave your paint surface bare and ready for another wax application or polish. Dish soap will not remove synthetic waxes such as Klasse.

        What Do I Need to Start My Own Detail Bay?

        Starting your own detailing shop can be a great experience and an opportunity to turn your hobby into a profession. Professional detailing has been around long before the automobile, detailing goes way back to the horse drawn carriage where resellers would hire professional detailers to refinish the carriages for resale.

        A combination of increasing values of automobiles and a decrease of spare time for today’s busy people adds up to a great opportunity to make a career in detailing. Auto detailing is also a great compliment to other auto services such as a garage, rental cars etc. One of the most frequent questions we get here is “I want to start a detail shop, what do I need?”. This can be a very hard question to answer in an email. A question like this can be answered in a book but we will try our best in this article!

        Where to start

        Start detailing for yourself, family members and friends. Get an idea of what you are getting yourself into. Many assume detailing is easy money, IT IS NOT! Detailing is a skill and takes many years of practice to learn techniques and problem solving. It is also hard on the body and requires decent physical shape. The simple fact is you will not be successful if you are inexperienced! Starting a detail shop cold turkey without any experience is a recipe for failure. Keep in mind, a customer is paying good money and they will scrutinize your job. Good news travels fast but bad news travels faster!

        What do I need?

        This question is answered with a question, what services do you plan on offering? A full blown detail shop that offers services from interior shampoos and steam cleaning to paint correction will require much more equipment and knowledge than a person that only offers interior vacuuming, exterior washing/waxing and so on. I will separate this into two groups below, Cleaning and correction. I will also keep this as simple as possible. There is no set package that will accommodate all detailers trying to start a shop; this is why we do not offer full detailing product packages.

        Exterior Cleaning

        It is possible to run a successful detail shop without offering polishing. Many customers are simply looking for a good interior cleaning/shampooing and exterior wash and wax. Below are the different steps of an interior/exterior cleaning with a few different products (In no specific order) that can be used on each step. Products are for reference but can be substituted for any product of your choice that performs the same job.

        Exterior Prewash. One of the most used chemicals we use in our detail shop is an All-Purpose Cleaner (APC). We use properly diluted APC’s as a prewash on every vehicle; this removes grease, wax, oils, loose dirt etc. We also spray this onto wheels, wheel wells, and engine bays. APC’s are then rinsed off with a pressure washer before we hand wash the vehicle.

        Examples of products needed:

        Examples of products needed:

        Examples of products needed:

        Examples of products needed:

        At this point you have yourself a clean dry vehicle. If you are equipped and skilled for paint correction this would be your next step. If not you will at least want to offer waxing/sealing to protect the vehicle.
        • Waxing or Sealing. We won’t get into a “Which wax is best?” debate, let’s just say you will need to have a few different selections of waxes or sealants on hand for your customers. Most customers who daily drive their vehicles are looking for long term protection as they may only detail their car once a year, in this case sealants are preferred.

        Examples of products needed:

        Paint Correction and Clay Bar

        For paint correction (Swirl removal, scratch removal stain removal etc.) You will need a good electric polisher, Several pads, and compounds. For clay barring or decontamination you can use a good clay bar or a liquid chemical.

        Examples of products needed:

        You should not need more than three different grades of compound as most jobs should not require more than two steps of correction.

        Additional supplies needed.

        Above are the basics you will need to fully detail and correct the exterior of a vehicle. Although there are many specialty products and tools you can purchase you need to start with the basics and add to your products as you come up with different needs.

        Interior Detailing

        Interior Fabrics, Plastic and  Leather. Although the interior contains many materials and different textures it is possible to complete interiors with just a few products thanks to multi-use products that are now available. Below is a list of products you will need.

        Examples of products needed:

        • Hot Water Carpet extractor, Mytee HP60 or 8070. This is the most valuable tool to any detail shop. In most cases the hot water alone will remove all dirt and grime from interior carpets and seats. It can be used together with cleaning chemicals to amplify its effectiveness. Although it is a large initial investment it quickly pays for itself and I cannot imagine running a detail shop without one. For low volume shops the 8070 is fine, for higher volume go for the HP60.
        • Chemical Guys Inner Clean, Griot’s Garage Interior Cleaner

        The above products can do 95% of the interior! They work on plastic, vinyl, rubber, leather, and fabrics!

        • Dedicated Leather Care. Although you can use multi-use cleaners on leather it is a good idea to have a dedicated cleaner and conditioner for leather. If you want to use a multi-use cleaner on leather you will still need a leather conditioner.

        Examples of products needed:

        Examples of products needed:

        Examples of products needed:

        In summary, the above is a great start to what you will need to start a detail shop. Your final chemical collection will start to get tailored as you start detailing. It is unlikely you will first purchase products and love them all the first time around.. Everybody has different opinions and preferences, different detailers here at eShine use their own favorite products.

        How to Wash an Engine Bay

        Many vehicle owners wonder if washing an engine bay is a necessity. We have all heard the tales of damage caused by engine washing, how the very thought of water makes an engine no longer run..... The fact is modern engines can take a lot more abuse than you can imagine. With weather-tight connectors, distributor-less ignitions and newer gasket technology, the water sensitive devices are well protected and will easily resist frequent washing. This article shows the most basic engine detail using the most basic tools.

        Here is where we start, always work on a COLD engine.

        Here we are using a diluted solution 1:4 (Kleenzit:Water). Simply spray the Kleenzit on the entire engine bay. Agitate any stubborn spots or any thick deposits with a light brush or towel. Try not to spray any liquids directly into/unto the alternator, you can also cover the alternator with a plastic bag for extra peace of mind.

        After Kleenzit has sat for a minute simply spray off using a garden hose. With a quality All Purpose Cleaner such as Kleenzit it is not necessary to use a pressure washer. Pressure washers on engine bays can cause damage if not used correctly. The high pressure can get under seals designed to keep water out under normal circumstances. If you cannot resist the urge to use a pressure washer be sure to use a lower pressure nozzle. Again, avoid aiming water directly into/unto the alternator.

        High quality all purpose cleaners such as Kleenzit will rinse clean and leave no residue on plastic items. This picture shows the results of Kleenzit with NO dressings!

        Before applying a protectant or dressing you want to dry the engine bay. Here again we use the most basic method by simply wiping dry using a waffle weave microfiber towel (Dehydrator Towel). You can also use compressed air or a leaf blower if you have those tools.

        At this point applying a protectant or dressing is optional. On older cars with weathered plastic/hoses it may be necessary. Here we are using Poorboy's Natural Look Dressing

        You can spray directly onto the plastics or spray onto an applicator and wipe on. Avoid getting any dressing directly on any belts.

        Let the dressing sit for a few minutes, no rush to wipe it off. Here is the finished product. This basic engine detail took no longer than 10 minutes and the results speak for themselves!

        Buffing Pad Prep and Care

        This article explains a few simple methods of pad care starting with pad prep, then proper pad pressure and use, then finishing off with proper pad cleaning. With proper pad care your pads should last many details. However…If you do not follow proper pad use and maintenance your pads can fail on the very first use!

        Pad Prep  

        It is very important to dampen the pad throughout, this does not mean dripping wet or barely misted with water. When the pad is dampened properly it will become very flexible and much easier to use. If the pad is dampened too much it will sling product everywhere and make a very undesirable mess on the vehicle and yourself! On the flip side if the pad is under dampened it will be difficult to use due to the stiffness of the pad and also be difficult for the product to absorb into the pad properly. Also if the pad is under dampened or not dampened at all, the foam will be brittle and tear/shred while you are using the pad. The following is the method I personally use to prep my pads.

        Items Requires: Plastic Bucket, Clean Towel, Water.

        STEP 1

        I first SOAK the pad throughout. This can be done in two ways, under running water or in a bucket half filled with water. Under running water massage and squeeze the pad until it absorbs water throughout the pad. If using a bucket of water you can hold the pad under the water and squeeze the pad a few times.

        STEP 2

        Once the pad is soaked throughout I fold the pad into a “U” shape and using my palms I squeeze the majority of the water out. Squeeze it several times until the majority of water is removed. The pads we sell are so durable you can also wring them out without damage!


        STEP 3

        Once this is done I place the pad in a towel and either squeeze or wring the towel that contains the pad. This method works great to remove residue water that is left from the first step, the remaining water will soak into the towel. You can also wring the pad inside the towel as shown here using our Dehydrator drying towel.


        STEP 4

        The last step is optional, you can use this method in a pinch instead of the towel method. If you used the pail to wet the pad you can now either empty the pail or just be sure to hold the polisher and pad below the rim of the bucket but obviously NOT into the water!

        With the pad attached to the machine on a low speed hold the pad in the center of the pail and turn machine on for a few seconds. The pail allows the pad to spin dry while not spraying the water all over the shop and your legs. Once this is complete you are now ready to buff! You may read this article and think this is a lot of work but once you have tried the above methods you will see you can prep a pad in 1-2 minutes!

        NOTE: During buffing the pad will start to dry on the backside. The face will stay wet due to the polish but the backside can become brittle and the pad can start to crack under the velcro. It may be necessary to completely re-dampen the pad during the job.

        Pad Pressure  

        Even with proper pad prep if proper pad pressure is not applied your pad can be ruined. With not enough pad pressure your pad can fly off the machine, product will splatter all over, and the pad Velcro and backing plate can burn due to slippage between the two. Inadequate pressure will usually burn the backing plate and/or the Velcro on the pad itself.

        Here is what inadequate pressure looks like, the backing plate is completely parallel to the pad and is not compressing the pad at all.

        Here is the perfect amount of pressure, the backing plate is indenting the back of the pad about a 1/4" but is NOT crinkling the edge of the pad.

        When too much pressure is applied it causes the backing plate to cut into the back of the pad and by deforming the Velcro it also causes the Velcro to detach from the foam. When you see the edge of the velcro deform and crinkle you are applying too much pressure.

        Remember each different pad will allow different pressures. For example a blue pad requires little pressure before it deforms the pad but if I was using an Orange pad I would be able to apply more pressure before the pad deforms.

        Here are a few pictures of damaged pads sent from customers, you can see the Velcro detaching and also the imprint from the backing plate due to excessive pressure. You can also see how the edges of the Velcro are crinkled.

        Above are some shots that show the proper pressure that needs to be applied to the pad. You can see the back of the Velcro starts to deform and crinkle the edges when too much pressure is applied.

        Pad Cleaning

        If you do not clean your pads after use the compound/polish/wax will dry up into the pad causing the foam to become brittle, the pad will also be much tougher to clean at this point. I have tried washing pads in the washing machine with limited success, the exterior of the pad gets cleaned but not the center of the foam, there was much residue left. To clean foam pads you do not want to use a detergent that is high-suds, imagine a dish sponge soaked with soap, no matter how much you rinse it, soap will still bubble! The last thing you need when polishing a vehicle is bubbles! We sell designated pad cleaning powder such as Snappy Cleaning Powder. If in a pinch you can also use an all purpose cleaner such as Kleenzit.

        Fill a 5 gallon pail with warm/hot water and add your pad cleaning solution. Now simply hold the pad under the solution and knead/massage the pad while submerged. You will actually feel when the pad is clean, it will first feel slimy then after 15 seconds or so it will start to feel squeaky clean!

        If you are cleaning a large number of pads in one shot you may want to dump the dirty water and make a new batch of solution halfway through your batch of pads. Once all pads are clean fill the bucket with clean water and rinse the pads in that. Another option is to do this under running water until you see no trace of solution (the water will run clear at that point)

        From there just squeeze the majority of the water from the pad and store. You can use the methods from the pad prep above to remove the water from the pad .I store my pads in a plastic container with a loose lid with a couple of holes in it. If damp pads are stored in a sealed container they will stink and can get moldy! 

        My First Polisher

        Purchasing your first Machine Polisher can be intimidating, just the thought of using what looks like an angle grinder on your baby makes you shiver! So many pads, backing plates ... so many Compounds/Swirl removers…I AM CONFUSED. Let us make your first polisher experience a pleasurable one and put confidence into your decision!

        We currently sell two very popular Dual Action Machine Polishers, the Porter Cable 7424xp and the very popular Flex 3401 Forced Rotation Dual Action.

        Q: What Accessories do I need with the Polisher?

        Porter Cable 7424XP - The Porter Cable Polisher does not come with the proper backing plate required for Velcro backed pads. You will need to also purchase a 5” Velcro Backing Plate in order to use interchangeable pads. We do sell this Polisher in a Swirl BusterKit that includes the proper backing plate and your choice of three CCS or Flat pads!

        The Flex 3401 comes with a 6" backing plate and would only need 6.5" CCS or Flat pads.

        CCS Pads?? What are they?  

        CCS stands for “closed cell structures". CCS is a popular new design by Lake Country. Conventional pads(Flat) can absorb polish too quickly which reduce polish and pad performance because most of the polish is trapped below the working surface of the pad. CCS technology solves this common problem by placing strategic patterns of partially closed foam cells.

        The advantages of CCS pads are,

        Slows rate of polish absorption – As discussed above, the pads are slow to absorb products and therefore the paint benefits from a longer working time. The same is true of liquid waxes and sealants.

        Improves operator control – CCS pockets gradually release polish as needed by the operator. Since these areas are not absorbing polish, they serve as little reservoirs until the excess polish is needed.

        Prevents pad skipping – CCS pockets reduce surface tension allowing the operator to run pad flat on a working surface. Basically, the CCS pockets break up the smooth surface of the foam to eliminate the sticking and skipping that occurs when two perfectly flat surfaces meet.

        Creates less heat – CCS pockets provide several points where the foam is not completely touching the paint. This reduces friction and therefore heat generated between the pad and the paint.

        OEM approved – OEM tests confirm CCS pads out-perform convoluted pad designs.

        Now which pads do YOU need

        First let’s talk about what pads do. Foam pads come in different compositions; they work in conjunction with liquid compounds, swirl removers, polishes, and waxes/sealants. Each pad only differs in texture providing more or less cut, sometimes no cut at all! The two work as a team and endless combinations of abrasion can be combined by changing the pad and liquid product.

        Using Pads systematically - Are you wondering why one doesn't just use the most aggressive pads to achieve the best results? I mentioned earlier that the white is often used after using the yellow/orange pad. A pad combined with a compound or swirl remover removes defects via abrasives. A more aggressive combination will often leave a haze. This haze makes the surface look dull, foggy, or milky. This is perfectly normal. The dullness is caused by the abrasives and pad combination which actually removed a thin layer of paint, this dullness can only be restored by using a less aggressive combination such as a lighter swirl remover and a lighter pad (usually the white pad). You will very rarely be able to jump right from a Yellow/Orange pad to a pre-wax, polish or finishing step. This rule does not always apply to light swirl removal where the first pad was either white, black or blue Most of the time for light jobs you are able to either use the white pad with a one step product and finish or use the white pad with a pre-wax/polish then finish with the black or blue pad.

        This Chart gives a full break down of Lake Country Pads, and their recommended uses.

        which pad do I need?  what is the best pad?  how do I fix swirls?  how do I remove tar?

        STEP 1:

        Compounding/swirl removal products are used for cutting.. Compounds are the most aggressive type of swirl removers dedicated for the most severe jobs including heavy oxidization and scratch removal. Swirl removers are the same as compounds but just a less aggressive type used for mild-medium oxidization and scratches/swirls.  After compounding the paint should be swirl free, but will likely have a light haze. 

         Examples of Compounds:

        paint correction, poorboy's world, remove swirls, meguiars 205

        Poorboy's Master

        Compound

        chemical guy's Canada, swirl remover, meguiars 205, auto obsessed

        Chemical Guy's VSS

        Scratch and Swirl Remover

        Menzerna Compound.  remove swirls, car detailing supplies

        Menzerna FG400

        Compound


        Because these pads will be used to remove defects the Polisher will be used on higher speeds such as 5-6 which is required to break down the product (See our swirl removal article for more info).

        Step 2.

        Polishing is the second step.  Polishing “cleans” the paint.  It brings back the shine and cleans up any light hazing left from compounding.  It will often remove light oxidization and light swirls without the need to compound.  Examples of some polishes are:


        Griot's polish

        Chemical Guy's Polish How do I polish my car?  How do I shine my car?  Why is my paint dull?  is machine polishine safe?
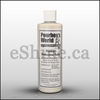
Poorboy's Professional Polish
        Sonax Polish Collinite Polish  Menzerna Polish


        Step 3.

        Protecting.  The final step is protecting the paint.  It does not make the paint clean or shiny, but adds a layer of protection from UV and seals the paint.  A sealed surface is more likely resist staining from hard water or bird poop. The finishing pads are completely non-abrasive.

        Example of Waxes:

        Carnauba Waxes (P21S, Souveran, Natty’s etc)

        Pure Sealants and Glazes (Klasse Sealant, Poorboy’s EX/EX-P etc)

        Example of Sealants:

        SEALANTS


        Proper pad care and prep is an often overlooked step.  Our blog on proper pad care can be just am important as proper polishing.

        Sample plans of attack - Here are some sample questions we receive and how they would be answered, you will notice most of the time the pad selection is very similar.

        Customer: I have a Black Honda that has moderate swirls that I would like to remove then Polish and wax the paint. The swirls are not terrible, just enough to bug me. I have heard great things about Optimum products so I would like to use them.

        Our Thoughts: Ok, he/she has some swirls…automatically I recommend at least ONE Orange pad. He may not need it but it is better to have it if the white is too mild. Because I am going to recommend an Orange pad I know he/she will have to use the White pad afterwards to remove the haze so I recommend one White pad for Mild Swirl remover. I will then recommend another White for the Polish step. Depending on what type of product he want to use as a polish (A one step product for example) I will end there.

        “Customer, I recommend the following procedure based on the condition you described,

        Step 1. Optimum Compound on an Orange Mild Cutting Pad
        Step 2. Optimum Polish on a White Polishing Pad
        Step 3. Optimum Poli-Seal on a White Polishing Pad or Green Polishing/Finishing pad.

        The above combination of pads is the most commonly recommended by us (One Orange, and Two White). We will also often recommend a fourth pad if the customer was going to use a two step product after swirl removal. For example, if the customer wanted to use Optimum for Swirl removal and finish off with Wolfgang the recommendation would be more like,

        Step 1. Optimum Compound on an Orange Mild Cutting Pad
        Step 2. Optimum Polish on a White Polishing Pad
        Step 3. Wolfgang Pre-Wax Polish on a White Polishing Pad or Green Polishing/Finishing pad.
        Step 4:  on a Black Finishing Pad

        Always make sure you have an ace up your sleeve, don’t order just white pads and a mild swirl remover because you think that should do, it is always a good idea to have an Orange Pad and a Compound just in case. It is better than having to place a separate order when you find your combination is too mild; chances are even if you have no need for it now you will use it in the future!

        Customer: I just purchased a new vehicle and I want to treat it with a Polish and wax. I am not looking at any type of compounds right now; I just want to protect it.

        Our Thoughts: He/she said they want to polish AND Wax, they did not ask for a one step product. This customer can get away with only two pads which are one White Pad for the Polish and one Black or Blue pad for the Wax. Because the majority of the time the customers are enquiring about a Swirl Buster kit which comes with three pads I will recommend a second White Pad because the White pad can be used for a light Swirl Remover if the future may need or it can act as a back-up to his polishing pad after extended use. We will use Klasse as an example

        Step 1. Klasse All-In-One on a White Polishing Pad or Green Polishing/Finishing pad.
        Step 2. Klasse Sealant on a Black or Blue Finishing Pad.

        Don’t bring a bazooka to a knife fight - Always TRY the least aggressive approach first, only step up the pad or product if necessary.Don’t automatically assume you will need to start with an Orange Mild Cutting Pad and a Compound just because you have the products, try the White Polishing pad first on a spot and see if it will do the job; if it does you can save time by not having to compound! If the trial proves too mild, then step up to a more aggressive pad/compound.

        Mix and match - As you gain experience you will learn you can mix and match products to achieve many levels of abrasion. For example, you may have just tried a White Polishing Pad with a Light Swirl Remover such as Poorboy’s SSR2.0. You found it was just not quite abrasive but feel jumping up to an Orange Mild Cutting Pad and SSR2.5 may be too much so you compromise! Try either the Same White pad with SSR2.5! Remember both the pad AND the product have their OWN abrasion level so mixing Hot and cold will make warm!

        Do you need more information on selecting the correct products?  Our Blog on common car care terminology might be useful.


        Social Proof